Are you want to add, edit, delete, or duplicate custom fields on your WooCommerce checkout to attract and capture more from your customers?
Then this article will guide you!
Some users feel satisfied with the default WooCommerce checkout options. But most of us need something (plugin or code) to customize our checkout pages based on our business (products) needs.
If you’re one of them, you’re at the right place.
Let’s look at the complete process that makes your checkout page more effective.
Table of Contents
Why do we Customize WooCommerce Checkout Pages?
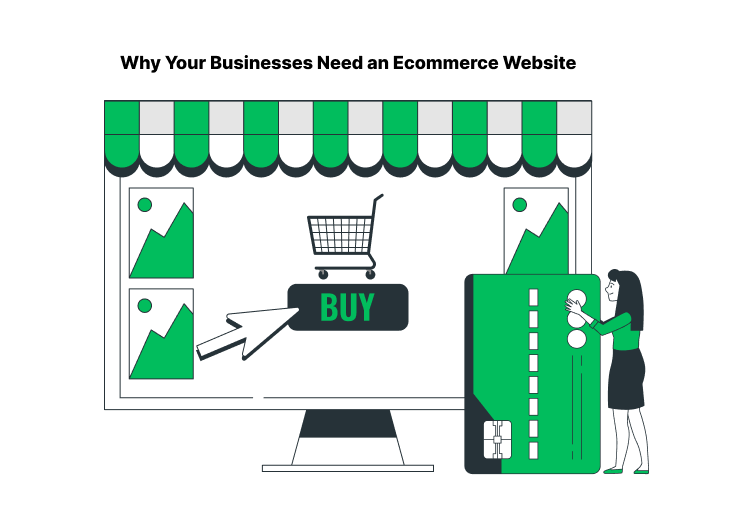
All of us know that in every Ecommerce store, checkout is the crucial part. It is where a customer either makes a purchase or abandons the site.
It is a common nightmare for most Ecommerce store owners that the customer leaves the site just one step before the payment.
Even if you provide a unique and feature-rich product, a Customized Product page, and a Neat Cart page, an unoptimized checkout page will change their mind to abandon the site.
So, you must provide a Customized Checkout page for your customers.
A fully customized checkout page brings traffic to your site and acquires more long-term customers. It expands users’ engagement on your site and makes purchases.
Thus, it automatically increases the conversion rate and reduces your site abandonment rate.
How to Customize WooCommerce Checkout Pages?
To customize the checkout page, we have two ways. One is by using custom codes, and the other with a plugin.
Learning particular codes to customize our checkout pages seems a waste of time. And most of us want to make the process easier. So, I chose the plugin method for customization.
Our team has handpicked one of the best WooCommerce checkout field editor and manager plugins to show the process. This plugin has more checkout options at an affordable price.
Check here to learn more about how to Customize your WooCommerce Checkout pages.
Checkout Field Editor and Manager for WooCommerce

Customize your WooCommerce checkout pages effortlessly with our Checkout field editor and manager plugin. Add, edit, delete, and modify the checkout fields in the billing and shipping sections.
The plugin provides 17+ custom checkout fields to capture more. You can create custom sections for your ease. Automatic field validation and easily customizable options are there to explore our checkout.
Most users feel enough with its Free version. So, give it a try at it!
Okay, let’s see the process to add, edit, and delete the fields on your WooCommerce checkout.
After installing the plugin, go to WooCommerce >> Checkout Field Editor on your WordPress. The dashboard page of the plugin will display on your screen.
How to Add Custom Fields to WooCommerce Checkout?
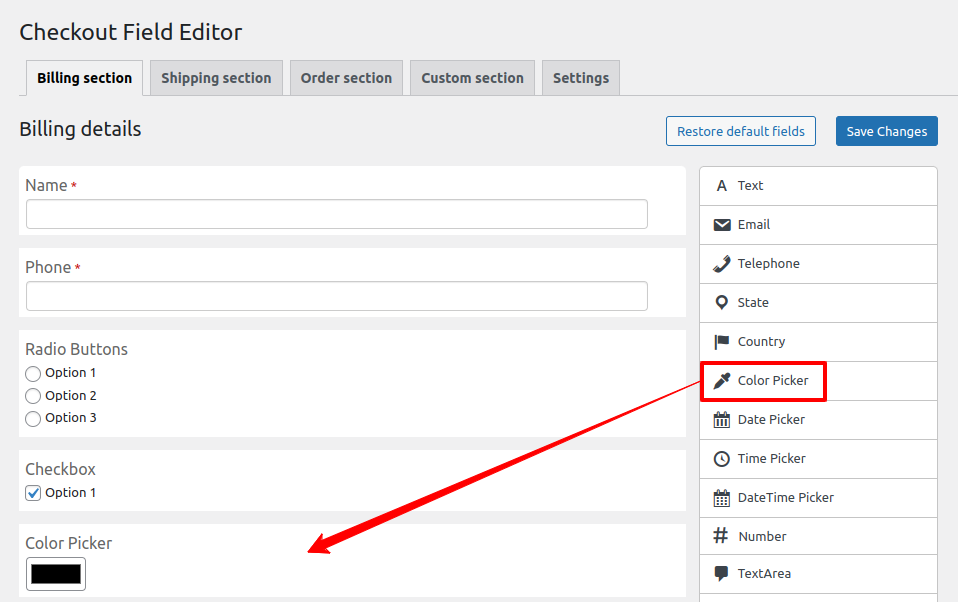
- On the right, you can see the 17+ different custom checkout fields of the plugin.
- You may pick yours and then drag and drop that on the checkout form.
- That’s it. You have now added your required (Custom) checkout field.
- Then, click the Save Changes button on the top-right of the page.
- Now, visit your store site’s checkout page to see the changes.
How to Edit Fields on WooCommerce Checkout?
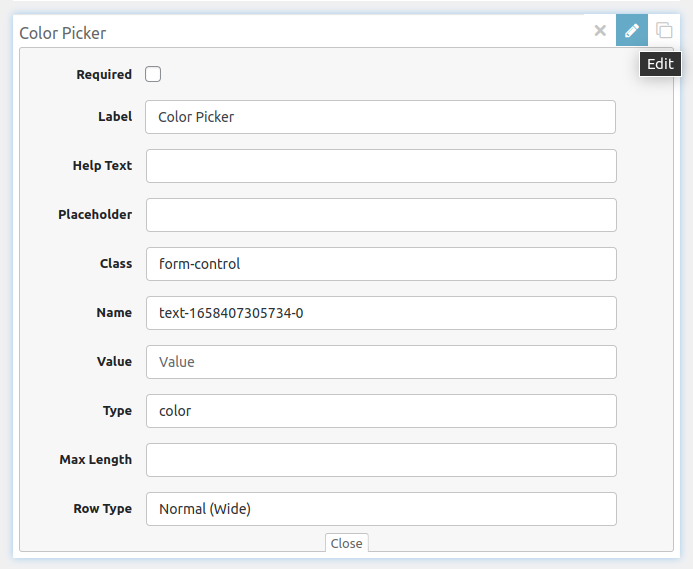
- To edit, click the second (Edit) option on the top-right of the respective checkout field.
- The editing options of that field will open.
- You can change the below options on the field type.
- Required – Make a specific field to fill mandatorily
- Label – Change the Label (Name) of the field
- Help Text – Place text to help customers understand what the field type is
- Placeholder – Display a short hint in the input field before the user enters a value
- Class – Add a space-separated list of CSS classes to the input element
- Name – Provide a unique name for the field type & no two fields have the same name (no need to edit)
- Value – Set a default value for the field
- Type – Put the text based on the type of field you need
- Max Length – Specifies the maximum number of characters allowed to enter the field
- Row Type – Decides the size of the respective field type (such as half left, half right, address)
- Finally, click the Save Changes button to save the edited checkout field.
How to Delete Fields from WooCommerce Checkout?
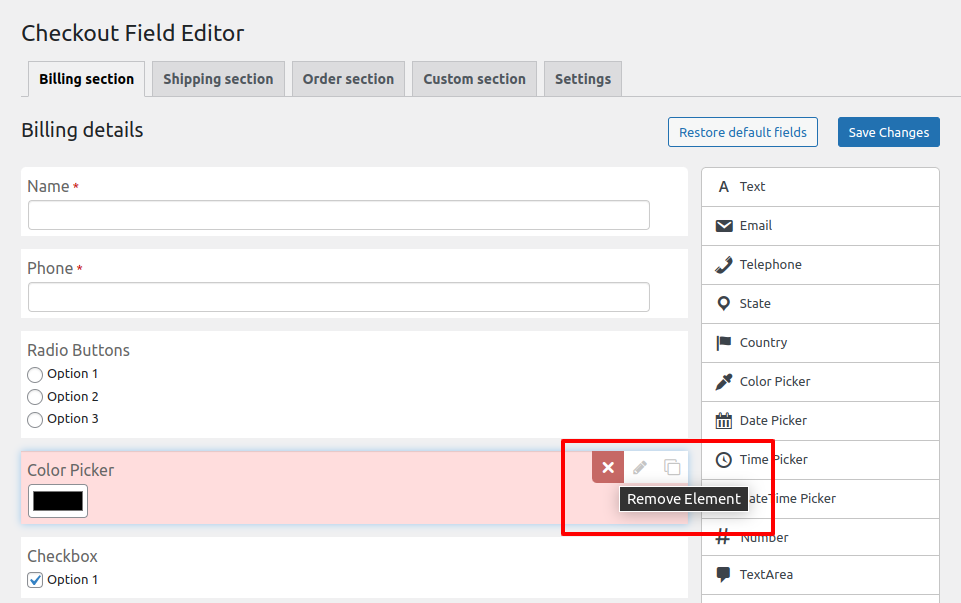
- To delete a field from your WooCommerce checkout, click the first (Remove Element) option.
- That’s it. Save the changes that you made.
How to Duplicate Fields on WooCommerce Checkout?
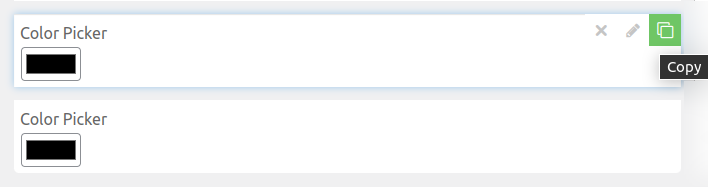
- To duplicate a checkout field, click the third (Copy) option on the top-right of the field type.
- You have now created a duplicate of the particular checkout field.
- Position it wherever you want as per your niches.
- Save the changes you made.
How to Show Custom Checkout Fields in WooCommerce Order Emails?
Adding custom checkout fields to your WooCommerce order emails provides follow-up information to your customers and keeps them informed about their orders.
Some types of checkout fields that you might regularly use include:
- TAX ID
- TVA in France
- NIP in Poland
- VAT UE in Europe
Since this function is not readily built-in WooCommerce, here are 2 methods to show custom checkout fields in your order emails:
- Using a plugin: Several plugins like YayMail can easily display custom fields in emails without coding.
- Adding PHP code: If you prefer a more hands-on approach, you can directly add code to your theme’s functions.php file.
In this tutorial, I would prefer to use the YayMail plugin to make sure my site will be safe and sound.
Now, let’s assume your customer has filled their custom field on your shop’s checkout page. It will be displayed in the admin order accordingly.

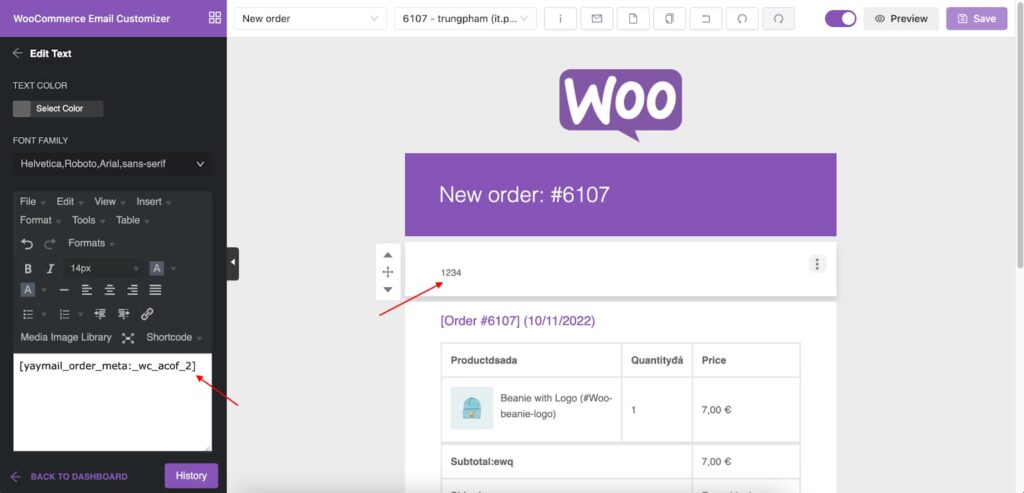
Next, to display these custom fields in WooCommerce order emails, simply follow these steps:
- Go to YayMail editor and add a new custom text block.
- Insider the text editor, choose the Shortcode menu, and pick the custom order information (order metadata) that was created before in the order custom fields plugin.
- Save the text block to apply your changes.
- Send a Woo test email or place a test order to see how it looks in the mailbox!
By following the steps above, you can easily add any WooCommerce custom field to the order confirmation emails. You can create and add multiple fields as needed.
Conclusion
That’s it. We have seen the simple methods to add, edit, delete, and duplicate the fields on your WooCommerce checkout.
Also, Customize your WooCommerce Checkout pages to increase your sales conversion rates and reduce the site abandonment rate.