Table of Contents
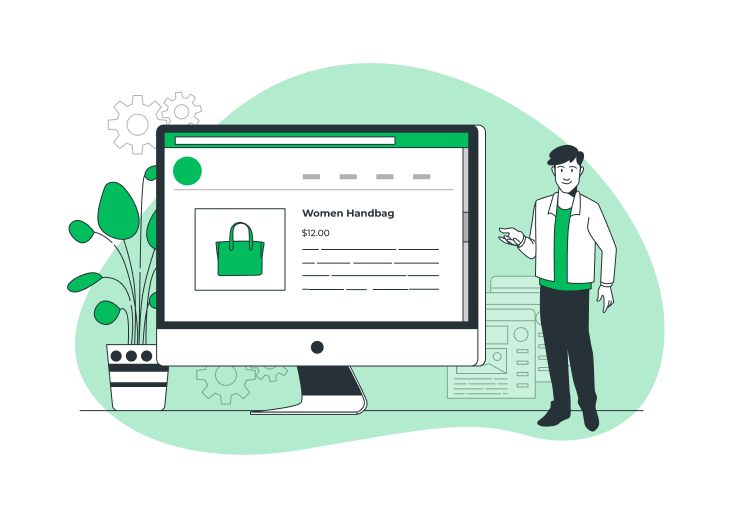
Introduction
In most Ecommerce stores, we use the default WooCommerce for our checkout. Some fields like the first name, last name, street address, and others are there. But, all industries don’t want such default fields for their checkout.
Also, we can’t edit the fields provided by the default WooCommerce.
But, there is a way!
We can add or edit the checkout fields by using custom codes or with the help of a plugin.
Learning specific codes for customizing our checkout pages takes time and is time-consuming. So, we take the other path, the plugin.
Why should we use the WooCommerce Checkout Plugin?
In WordPress, there are lots of plugins to help us. They are used for store setups, payment options, cart recovery, several shipping issues, and customizing our product, cart, checkout pages, and so on.
Likewise, we’re going to use a Checkout Field Editor plugin to customize our WooCommerce checkout pages based on our needs.
The plugin can eliminate several page problems and site abandonment rates. But, there is a little hitch.
WordPress provides a ton of well-featured plugins for us. We are the ones who have to select which one is suitable. So, our team has picked up a plugin that can be suitable for almost all Ecommerce sites (contains checkout).
So, have a look at it.
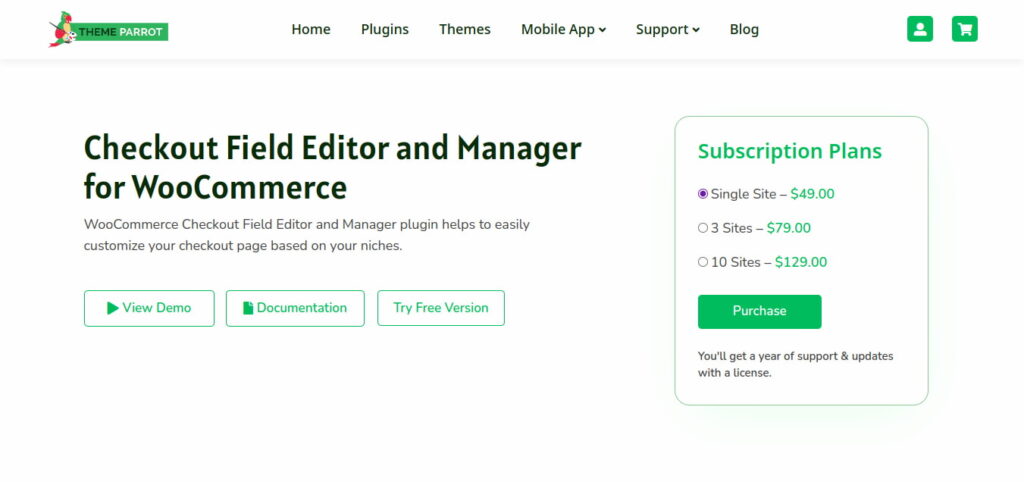
Checkout Field Editor and Manager for WooCommerce

The Checkout field editor and manager for the WooCommerce plugin help to add, edit, delete, duplicate, and reposition the checkout fields. The plugin provides 17+ custom checkout fields to capture more from your customers during their checkout.
You can edit the custom as well as the default fields. Customize the fields in the billing, shipping, and order sections, or you can create custom sections for your flexibility.
Provide A Clean & Neat Checkout Page For Your Customers
Custom Checkout Fields
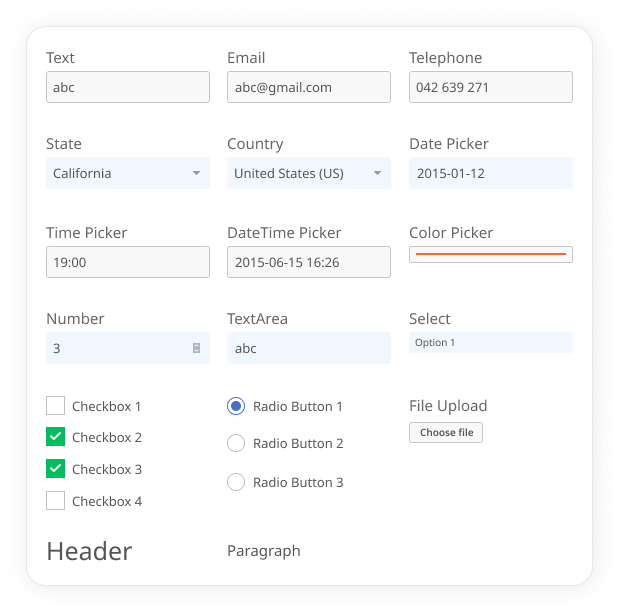
- Text
- Telephone
- State
- Country
- Color Picker
- Date Picker
- Time Picker
- DateTime Picker
- Number
- TextArea
- Select
- Checkbox
- Radio Buttons
- Paragraph
- Header
- File Upload
Key Features
- Automatic field validation
- Easy section positioning
- Create & place the custom section
- More customizable options
- Edit fields effortlessly
- Simple checkout optimizations
- Supports validations
- Lots of customizations
- Additional CSS classes
- WPML compatibility
- Drag & drop form builder
- Suits for all store types
- Help text features
- Take special notes with the order section
- Freemium plugin
- Compatible with the majority of WordPress themes
- User-friendly interface
- No coding required
- Get a year of support & licenses for free
- Lightweight & easy-to-use
Pros
- A Free Version is available
- A Live Demo is available
- A year of Free Support & Licenses
Price
- Single Site – $39.00
- 6 Sites – $79.00
- 26 Sites – $129.00
Installation & Activation of Checkout Field Editor & Manager Plugin (Free)
First, you’ve to visit the ThemeParrot site and select the Plugins on the menu bar or scroll down the page a little. There you can see the Checkout Field Editor and Manager plugin.
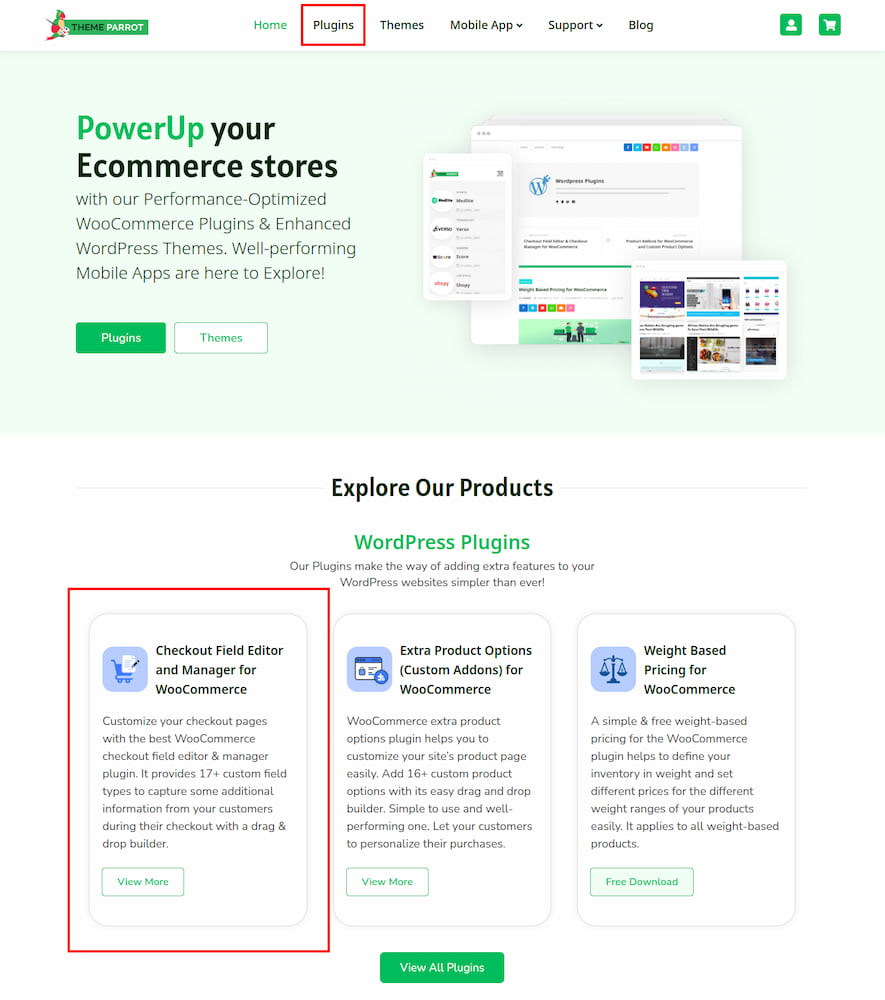
Click that to reach the plugin page.
You can see the subscription plans, demo viewing option, a link to the documentation, and try the free version.
Scroll down to view all the features and compatibilities of the checkout field editor and manager for the WooCommerce plugin.
Click the Try Free Version button. That directs you to the WordPress.org site.

Click the Download button. That’s it. The plugin file is saved on your system successfully.
Now, go to your WordPress dashboard >> Plugins.

Click the Add New button. And then, click Upload Plugin >> Choose file.

After that, go to Installed Plugins. You can see the Checkout Field Editor and Manager for the WooCommerce plugin displayed on that list. Click the Activate option to get started.

That’s all. We’ve successfully installed and activated the plugin on our WordPress.
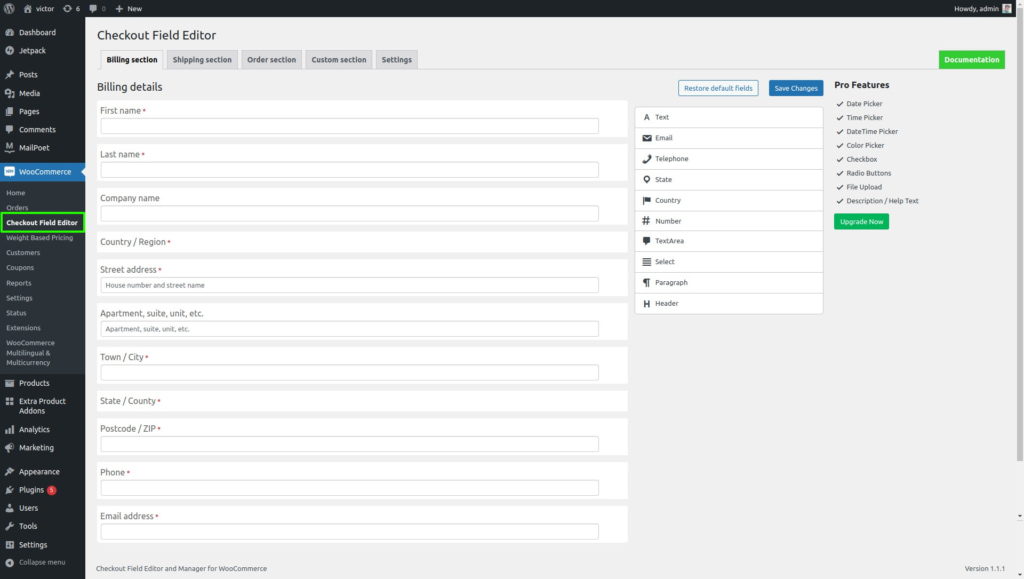
Next, navigate to the WooCommerce >> Checkout Field Editor. The dashboard of the plugin opens. You can see Ten custom checkout fields and some limited features only.
The Checkout Field Editor Pro
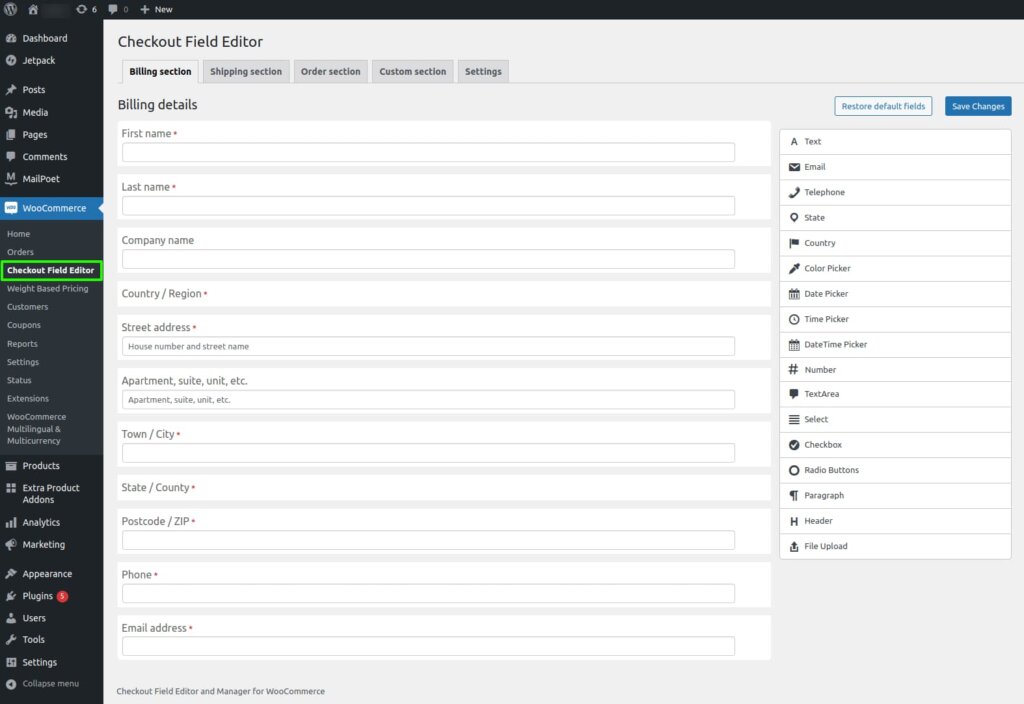
Some Ecommerce store owners feel enough with the basic features (free version). But, most of us want to explore more. For that, we have to get its Pro version.
With the Pro, you can experience all its features without any limits. I’ve clearly explained all its custom checkout fields and the key features above.
The price is also affordable and worth it for its providing features.
Installation & Activation of Checkout Field Editor & Manager Plugin (Pro)
The installation and activation process is nearly the same as I gave above. After activating the Pro plugin, you can see the changes on your plugin’s dashboard.
Why should we need Checkout Pro?
Okay, let’s see an example to clear you better.
Let’s say you own an online Ecommerce cloth store website, and your bounce rate (here, it’s similar to the site abandonment rate) was comparatively high.
So many factors are there that directly affect your sales and conversion rates. Check the top proven techniques to improve your Ecommerce sales in 2023. Kindly visit to get something about that.
Also, some plugins are there that every Ecommerce website must have.
Alright, let’s continue the example.
Improper customization of the WooCommerce checkout pages leads to an increase in the site abandonment rate. So, optimize your checkout pages as well as possible to avoid such issues.
The checkout field editor and manager allow us to add custom checkout fields, remove the default (unwanted) ones, edit the custom and default fields per our product niches, and so on.
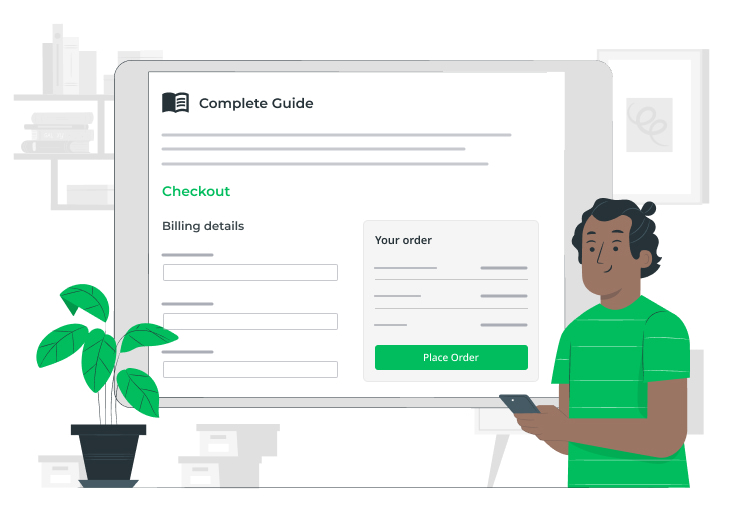
Let’s look at the comparison of improper (default) and customized checkout pages to ease you.
The below-shown is the default checkout provided by WooCommerce for all Ecommerce store sites.
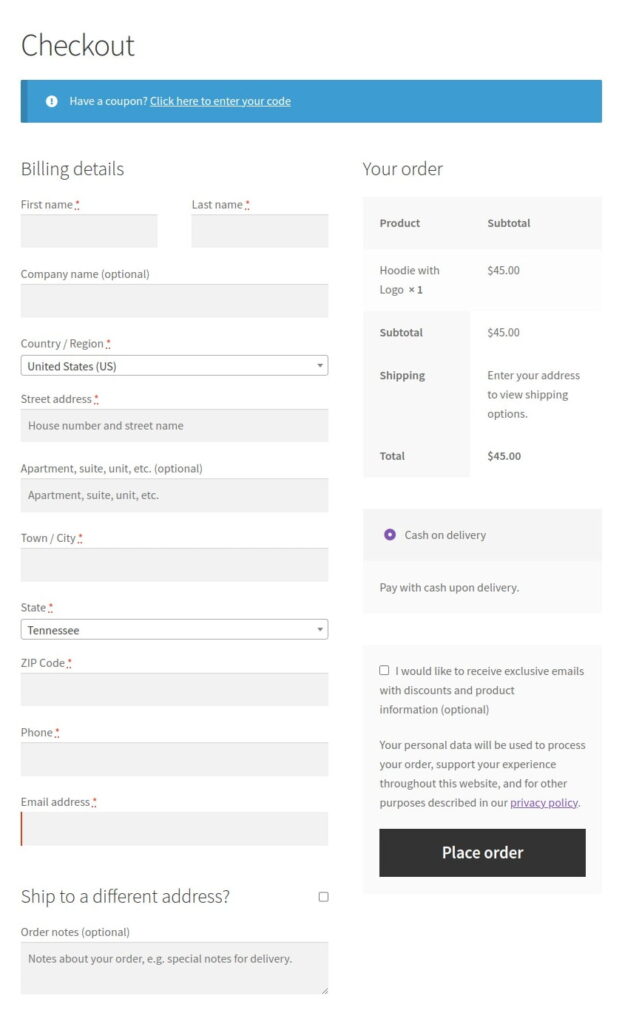
This is customized by the Checkout Field Editor and Manager for the WooCommerce plugin.
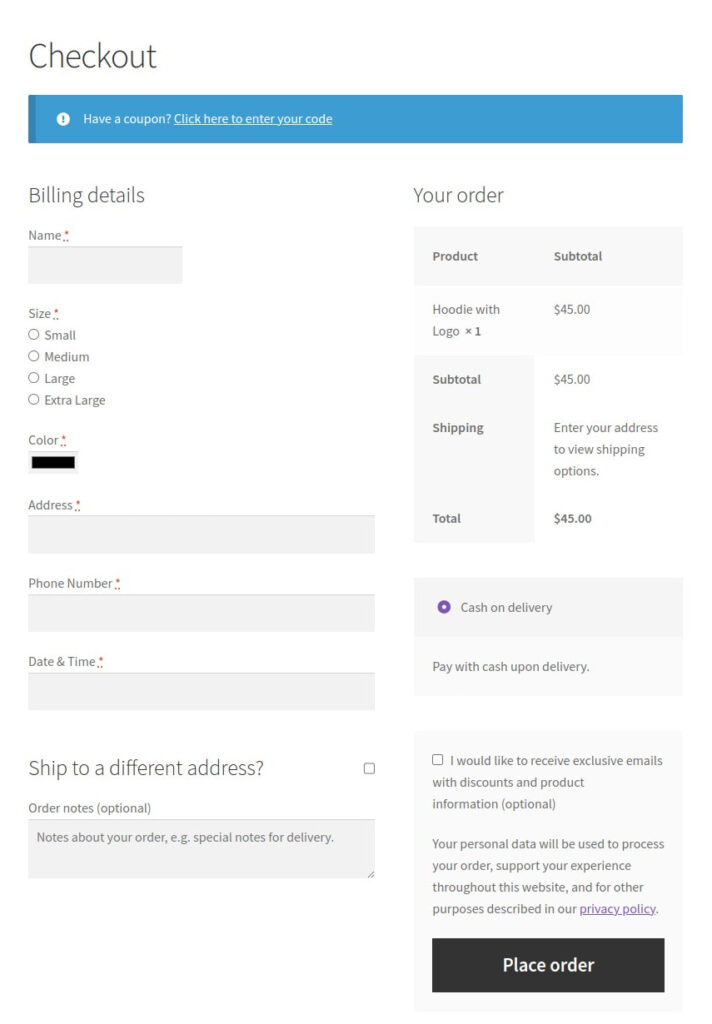
Do you like the customized one?
Yes, you are.
Also, check here to learn How to Add, Edit, Delete, and Duplicate the Fields on your WooCommerce Checkout.
Okay, I’ll tell you how to configure and utilize its Settings.
Checkout Field Settings
Go to the Settings section. You’ll see the below-displayed page.
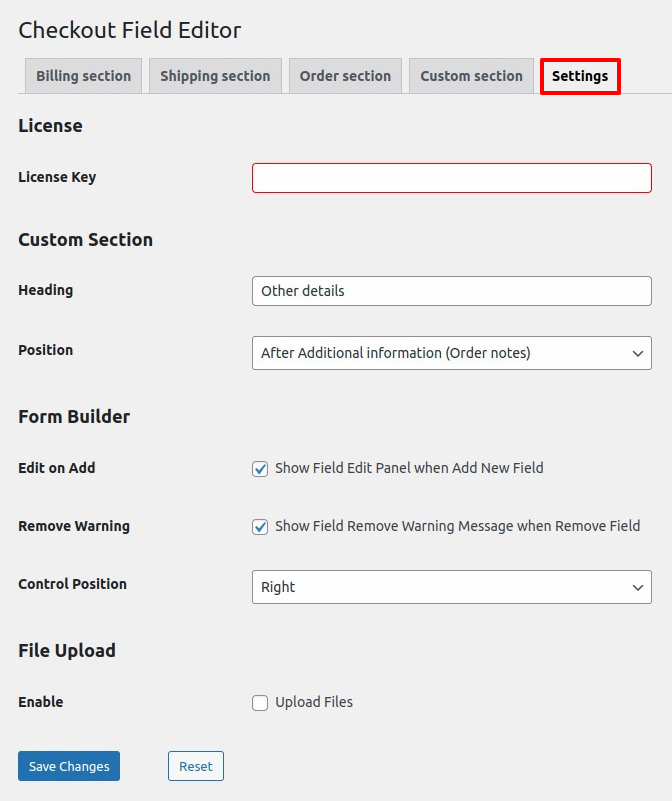
License
On that page, you’ll have to enter the given License key first to ensure the Pro features.
Custom Section
Next, you should provide the heading and position for the custom section. The position field contains 13 types of orders, so choose which one you want.
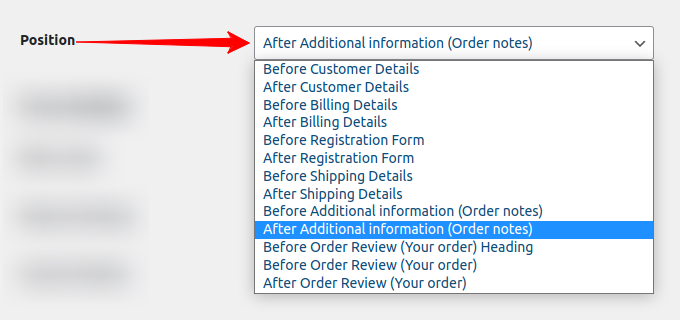
Place the custom section before and after the customer details (top and bottom), billing section, and registration form.
If you have a registration form on your site for the guest visitors to fill out before placing orders, you can put this section with that form by selecting this option.
- Before Shipping Details – It will be placed before the shipping section.
- After Shipping Details – It will be placed after the shipping section.
If you place a custom section with shipping, it gets viewed only after enabling the ship to a different address (by default, it gets hidden with shipping details).
- Before Additional Information (order notes) – The section will be placed before the order section.
- After Additional Information(order notes) – The section will be placed after the order section.
- Before Order Review(your order) heading – The section will be placed before your order details heading.
- Before Order Review(your order) – The section will be placed before your order details.
Form Builder
Edit on Add – Enable this to open additional fields in edit mode by default.
Remove Warning – Enable this to ask you the confirmation before deleting a field.
Control Position – Decides whether the field list should be left or right (by default, it’s on the right).
File Upload
First, check the enable box if you want to allow the customers to upload files, pictures, and others on your checkout form.
You can limit the upload file size by its Maximum size feature. Also, set the format or type of the image, text, document, and font that has to be uploaded.
Finally, save all the changes you’ve made or reset the default fields by clicking either the “Save Changes” or “Reset” buttons.
Conclusion
We saw all the features and customizable options of our Checkout Field Editor and Manager for the WooCommerce plugin in this article. Also, I’ve linked to the relevant blogs that provide the solutions for all your checkout-related issues.
I hope you get something new today!