Do you want to add, edit, delete, or duplicate custom fields on your WooCommerce product pages to improve the sales conversion rates?
Then, this guide will help you!
Table of Contents
The Difference!
The default WooCommerce does not provide us with any fields to display on our product pages. So, we have to install a plugin for that.
The below-shown is the page provided by default WooCommerce.
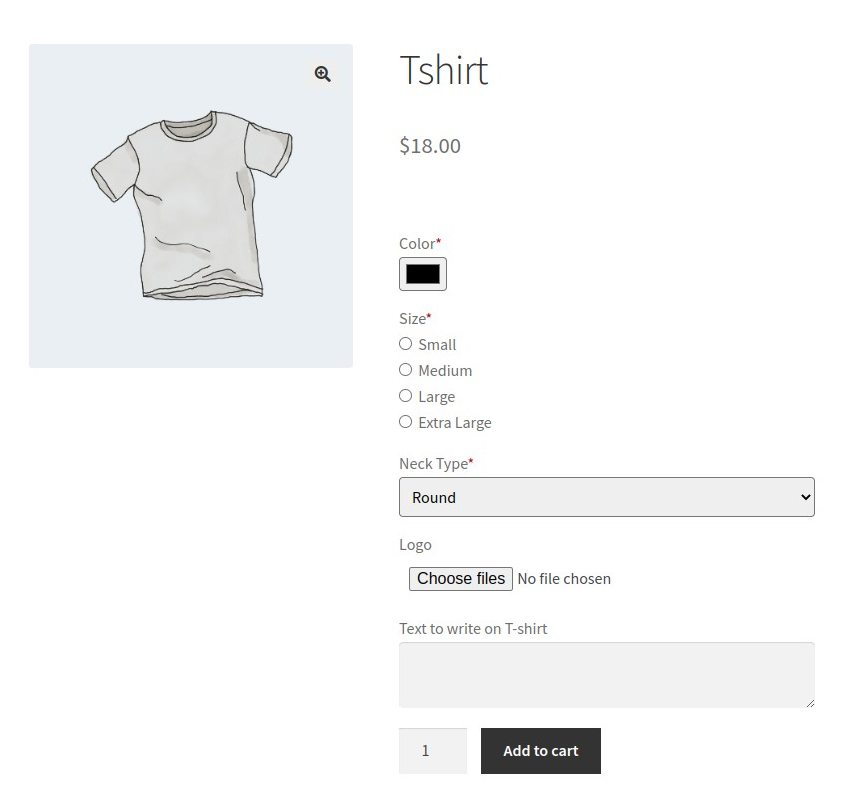
This product page is customized with the Custom Product Addons plugin.
But, there is also an issue. A lot of plugins are there in our WordPress directory.
So, our experts have handpicked the Extra Product Options (Custom Addons) for the WooCommerce plugin to customize the product pages based on your business needs.
It provides so many rich features at an affordable price and suits almost all Ecommerce (products contained) sites.
Extra Product Options (Custom Addons) for WooCommerce
Customize your WooCommerce product pages with Extra product options plugin. Add, edit, delete, duplicate, and modify the 19+ custom product fields to provide a dynamic product page to the customer’s desire.
Create multiple product sections (forms) to capture more. The custom fields display on the page based on the conditions you give (Conditional logic). Easily position the custom sections wherever you want on the product page.

With its simple drag-and-drop form builder, you can pick the custom field and add that to your form. No need for coding knowledge is required.
A lot more customizable options are there to explore your WooCommerce product pages.
Most users feel enough with its Free Version. So, give it a try at it!
Check here for a detailed process to Customize (Optimize) your WooCommerce Product pages.
Let’s see how to add, edit, delete, and duplicate the custom fields to your WooCommerce product pages.
Product Page Customization
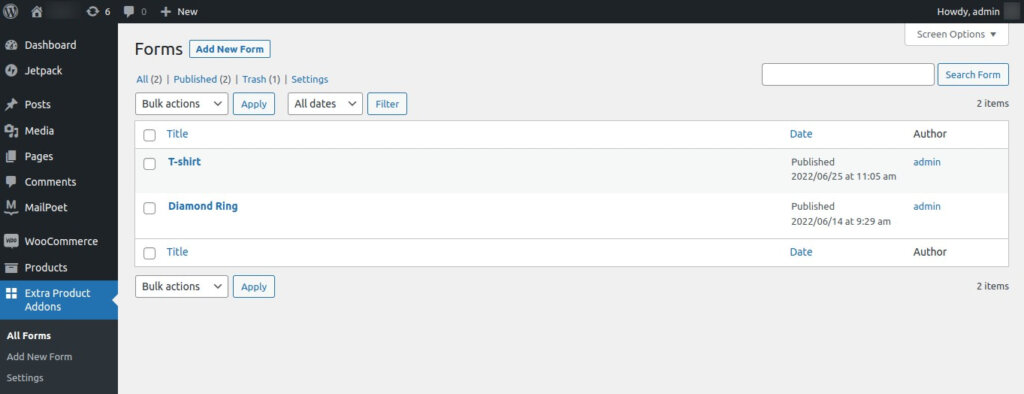
After activating the plugin, go to your WordPress dashboard. The “Extra Product Addons” option is below the “WooCommerce” section. Click that, and you’ll see the below page displayed on your screen.
How to Add Custom Fields to WooCommerce Product Pages?
As I said, you can only provide some limited fields on the product page with our default WooCommerce. If that’s not enough, you may add some with the custom product options plugin.
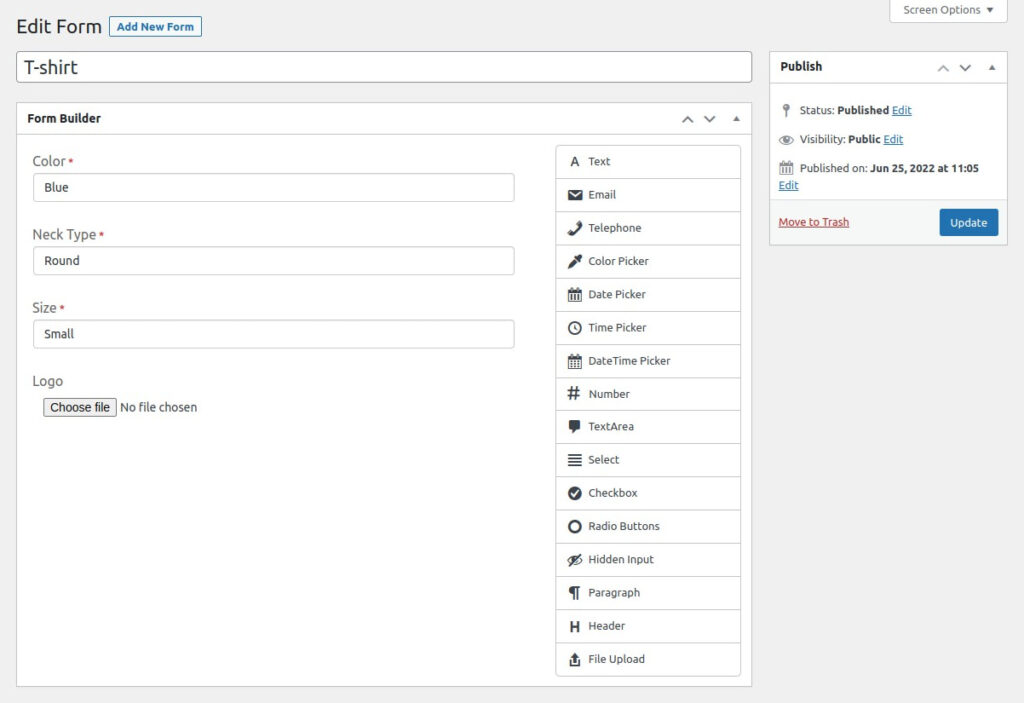
Click the Add New Form option on the top left portion of the page.

The below-shown page will open on your screen.

You can see the product fields on the right side of the page.
Just drag the custom product field (option) you want to include and drop that on the form. Position them where you want. Also, give a title to the created form.
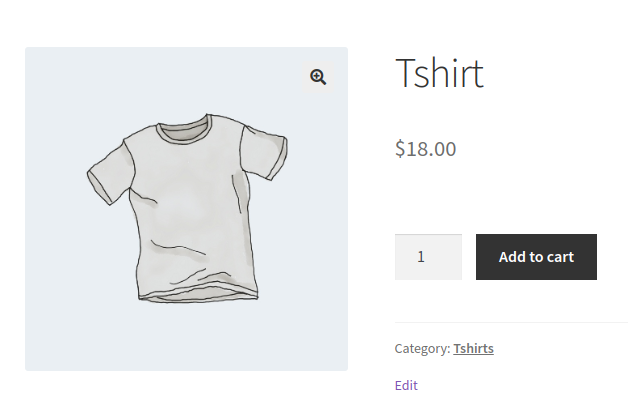
In this, I’ve created a custom product form for the product T-shirt.
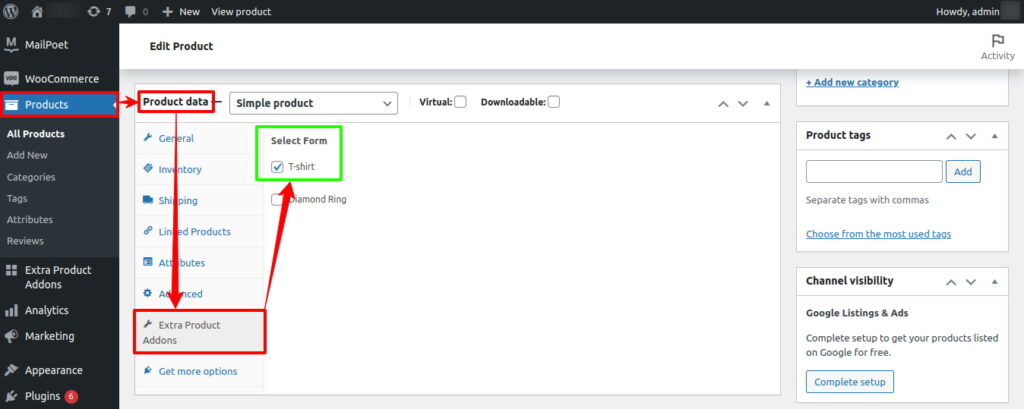
Next, go to the Products section (positioned just above the Extra Product Addons).
On that page, choose the product you want to add to the created form and click that. Here, I added the custom form to the product T-shirt.
That’s it! We’ve added the custom fields to our WooCommerce product page.
How to Edit Custom Fields in WooCommerce Product Pages?
We can edit the product fields based on our updates. But, we don’t have to remove the custom field and create a new one. Instead, we can edit that field to suit our product needs.
It is also as same as the above method.
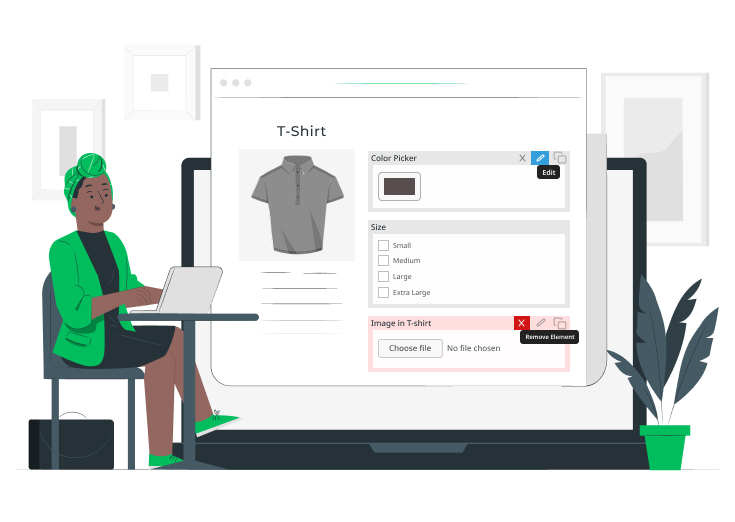
Hover the mouse over the top-right portion of the field you want to edit. Click the Edit option, and you can see the below-displayed options.
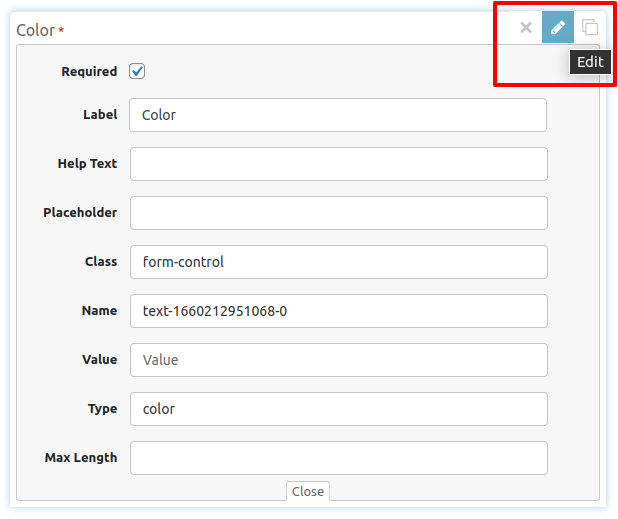
On this page, you can edit:
- Required – Enabling this checkbox makes the field mandatory.
- Label – Provides title to the field.
- Help Text – Provides a pop-up message on the product page.
- Placeholder – Provides a short hint (a sample value or a short description of the expected format) that describes the expected value of an input field.
- Class – A space-separated list of CSS classes will be added to the input element.
- Name – Provides a unique name for the field & no two fields have the same name.
- Value – Set a default value for this field.
- Type – Select the type of text you need for this field (text, e-mail, telephone, and color).
- Max Length – Specifies the maximum number of characters allowed to enter this field.
Finally, save the changes made by clicking the Update or Save Changes button.
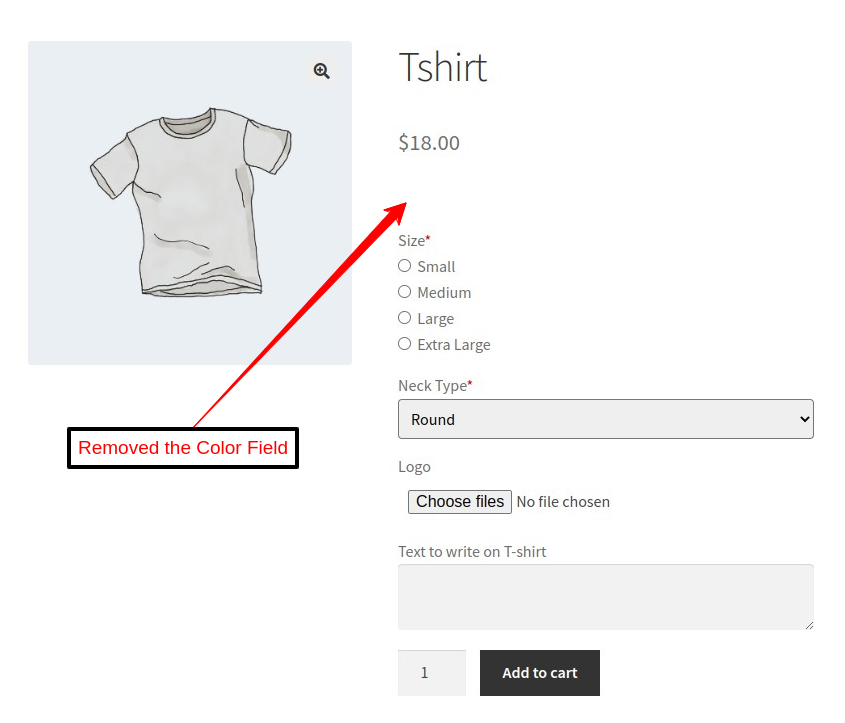
How to Remove Fields from WooCommerce Product Pages?
Sometimes, we change our product’s features (or other options) according to recent trends. So, we’ve to remove some product fields. That is also easily carried out with this plugin in no time.
All you have to do is just go to the form you want to remove the field. And just hover the mouse over the top-right of the custom field. There you can see the Remove Element option as the first. Click that.
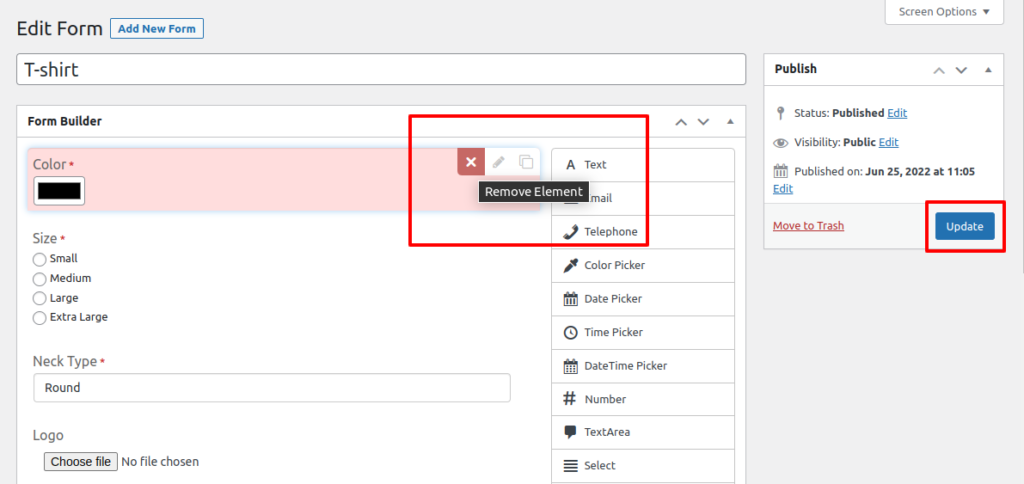
That’s all. You’ve deleted that unwanted field, and don’t forget to click the Update button before exiting the page.
How to Duplicate Fields in WooCommerce Product Pages?
To duplicate a checkout field, click the third (Copy) option on the top-right of the field type.
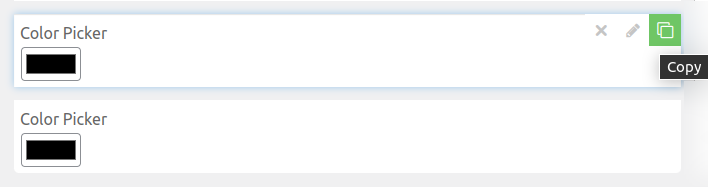
You have now created a duplicate of the particular checkout field. Position it wherever you want as per your niches.
Conclusion
Now, we learned how to easily add, edit, delete, and duplicate the fields on WooCommerce product pages. Provide customized product pages to satisfy your customers and also provide only relevant field types.
Thus, your customers personalize their purchases on your site and purchase products without any hesitation. It will automatically improve the conversion rate and users’ engagement time on your site.