Table of Contents
Introduction
Nowadays, most sales are completed online rather than in offline stores as we can buy whatever we want without getting a step out.
In this, we can see all the product specifications, images, ratings, reviews from various customers, and images of the delivered product. After only we decide whether to make a purchase or not.
If you’re an Ecommerce store owner and want to increase your sales conversion rate by selling your products on your online site, then you must customize your site pages. That includes the customization of the product, checkout, cart, and other landing pages of your site.
This article smoothly guides you on Customizing the Woocommerce Product pages with the Extra Product Options (Custom Addons) plugin.
Okay, let’s see them step by step.
Why should we use the Product Addons Plugin?
Everybody knows that the default WooCommerce doesn’t provide any options (fields) on our product pages. With that, we can’t do anything (beyond the limited features) to increase the sales of our products.
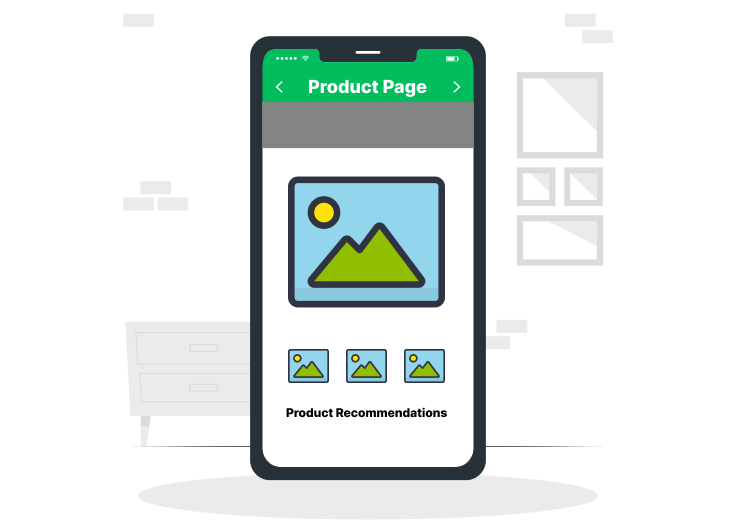
The below-shown product page is the default.
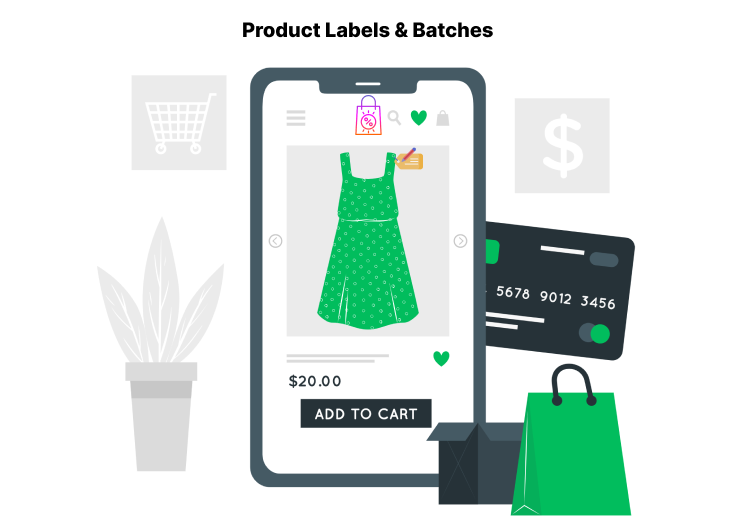
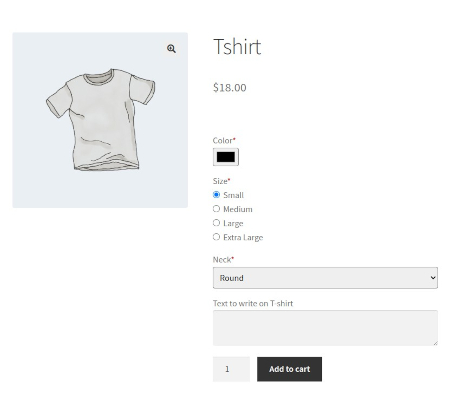
The page shown below was optimized using the Custom Product Addons plugin.
Check How to Customize (Optimize) WooCommerce Product Pages based on our needs.
Want to add custom options to your product?
Then, you have to find a suitable plugin that meets your business niches.
But, there is also an issue. Lots of plugins are there in our WordPress directory. They are rich in features and provide lots of optimizations. We are the ones who have to select which one is suitable or meets our business niches.
I’m here to help you with that! Try WooCommerce Single Product Page Customizer also!
After a long process, our team has picked this plugin only because it suits almost all types of Ecommerce store sites with so many rich features and easily customizable options at an affordable price.
So, let’s have a look at the plugin.
Extra Product Options (Custom Addons) for WooCommerce

Extra product options and custom addons for the WooCommerce plugin help to add, edit, delete, duplicate, and modify the custom product fields. The plugin provides 19+ custom product fields to provide valuable details and acquire more information on your product page.
Let Your Customers Personalize Their Purchases
You can create multiple custom product sections based on your flexibility. Its conditional logic feature helps you display the created custom product fields wherever you want on that page.
Custom Product Options (Fields)
WooCommerce extra product addons plugin provides the following custom fields:
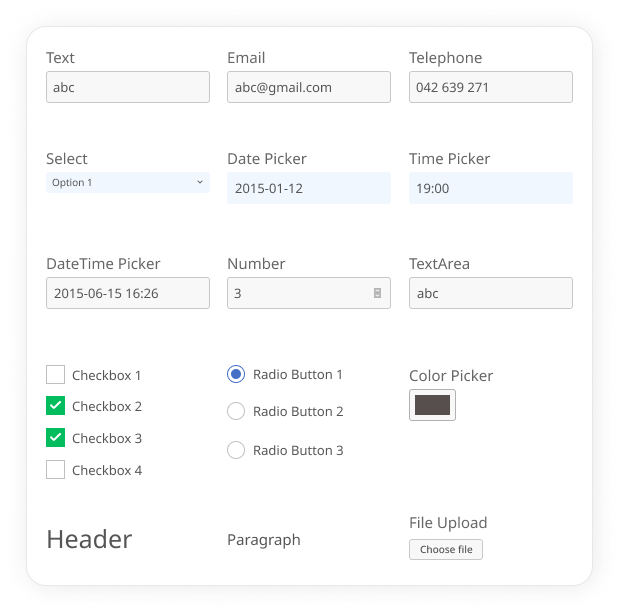
- Text
- Telephone
- Color Picker
- Date Picker
- Time Picker
- DateTime Picker
- Number
- TextArea
- Select
- Checkbox
- Radio Buttons
- Hidden Input
- Paragraph
- Header
- File Upload
Key Features
- Create custom price fields
- Easy section positioning
- Conditional logic (dynamic fields)
- Edit fields in no time
- Suits for all store types
- Freemium plugin
- Hidden input feature
- Create custom product sections
- Order and position the product forms
- Set price options
- Show/hide varying prices based on options
- Help text feature
- Reposition the product fields
- Simple drag-and-drop form builder
- Make a field required or not
- WPML compatibility
- Compatible with the majority of WordPress themes
- User-friendly interface
- Additional CSS classes
- No coding required
- Lightweight & easy-to-use
Pros
- A Free Version is available
- A Live Demo is available
- A year of Free Support & Licenses
Price
- Single Site – $39.00
- 6 Sites – $79.00
- 26 Sites – $129.00
Installation & Activation of Extra Product Options (Custom Addons) Free Plugin
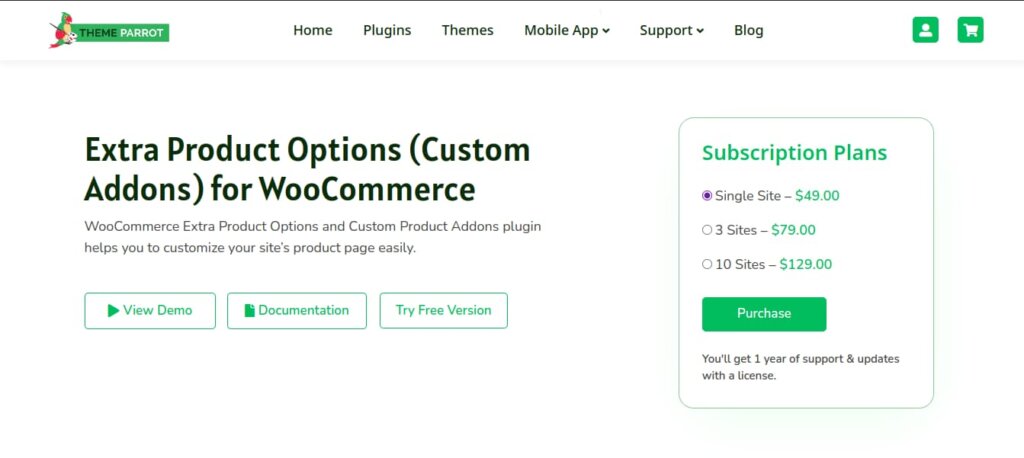
First, you’ve to visit the ThemeParrot site and select the Plugins on the menu bar or scroll down the page a little. You can find the Extra Product Options (Custom Addons) for the WooCommerce plugin.

Click that to reach the plugin page.
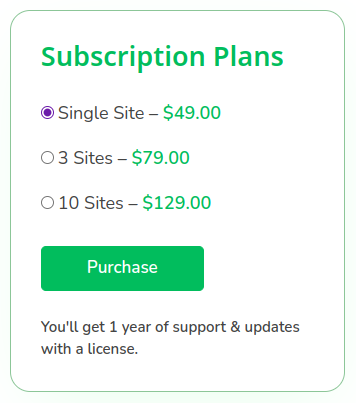
You can see the subscription plans, demo viewing option, a link to the documentation, and try the free version.
Scroll down to view all the features and compatibilities of the extra product options and custom addons for the WooCommerce plugin.
Click the Try Free Version button. That directs you to the WordPress.org site.
Click the Download button. That’s it. The plugin file is saved on your system successfully.
Now, go to your WordPress dashboard >> Plugins.

Click the Add New button. And then, click Upload Plugin >> Choose file.

After that, go to Installed Plugins. You can see the Extra Product Options (Custom Addons) for WooCommerce plugin displayed on that list. Click the Activate option to get started.

That’s all. We’ve successfully installed and activated the plugin on our WordPress.
How to Create a Custom Product Form?
Navigate to the Extra Product Addons positioned under the Products section. You can see the Forms page of the plugin.
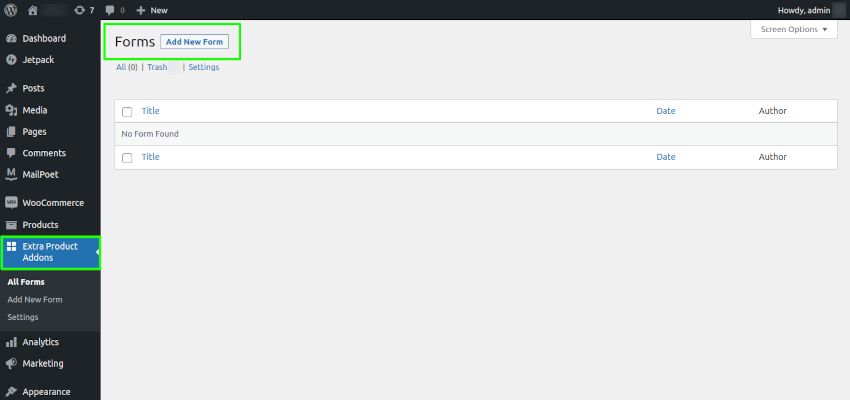
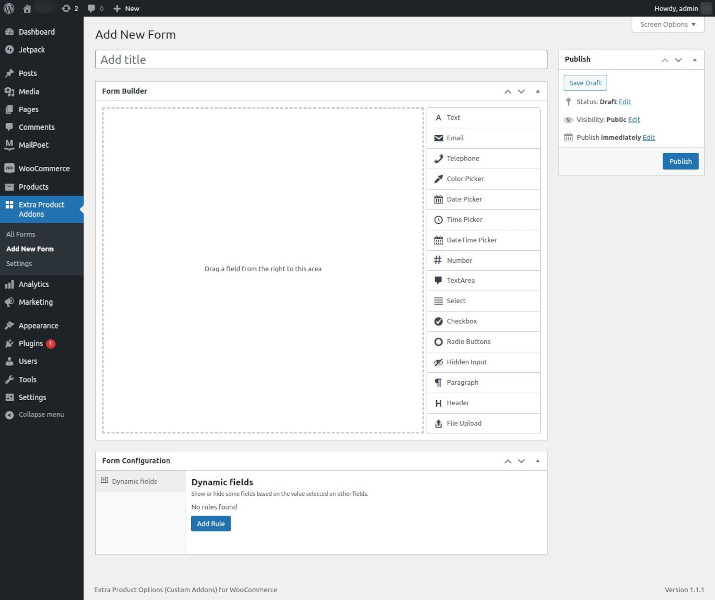
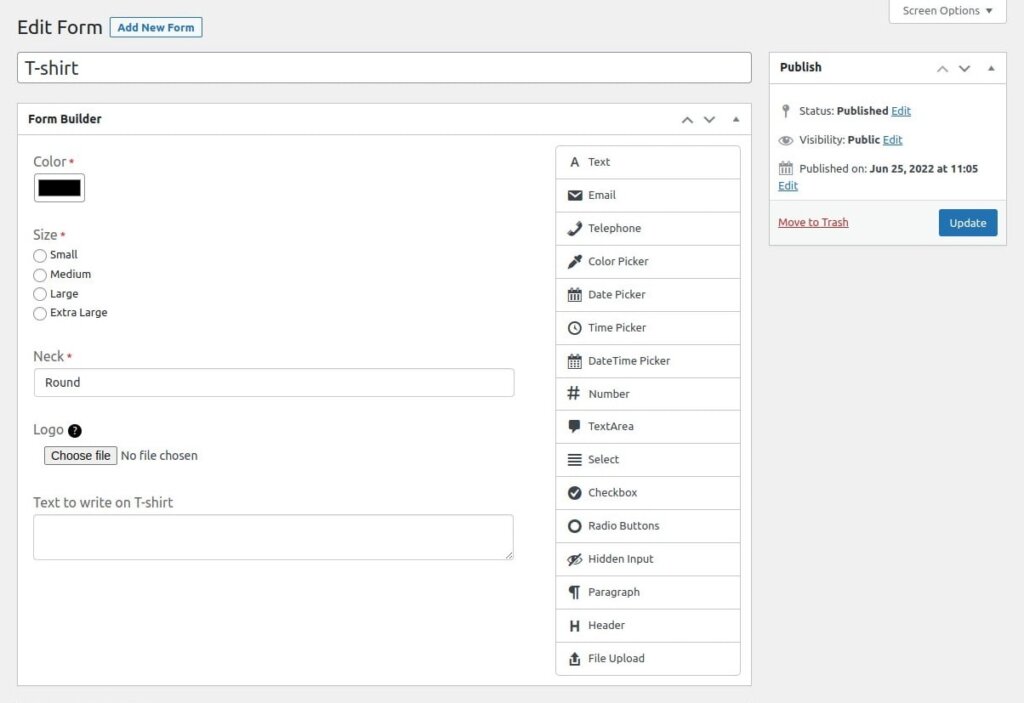
Click the Add New Form button to create yours. Then, the below page opens on your screen.

You can add whatever custom product fields you want to add to your product page based on your business needs.
Here, I added some fields for the product T-shirt. Let’s build up the form.
To create your custom product form, you must know How to Add, Edit, Delete, and Duplicate the Custom Fields on your Woocommerce Product Pages.
We’ve only the Free version of the plugin, so we are allowed to add some limited fields to our product.
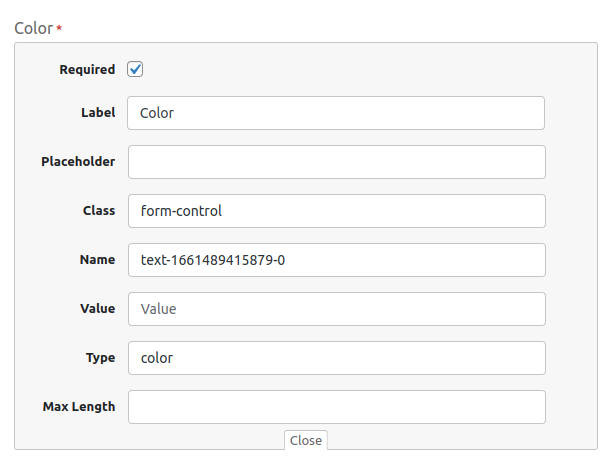
First, we add the Color field by dragging and dropping the Color Picker option from the custom fields.
Click the Edit option on the top-right of the field to modify that.

Then, edit the Label (name of the field) to Color (name whatever you want). And, make the field Required as choosing the color was essential to display the availability and variable prices.
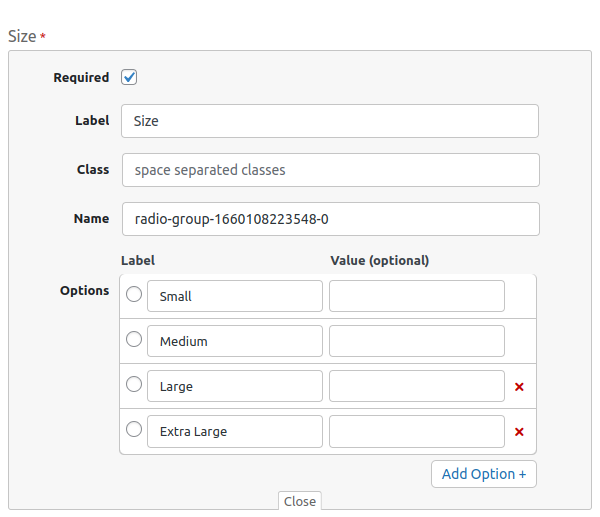
Second, we add the Size field by picking the Radio Buttons.
On that also, we edit the label to Size. And add four options Small, Medium, Large, and Extra Large. Also, you can add the value based on the sizes, and it’s optional. See them on the Pro version. Make the field as required as well.
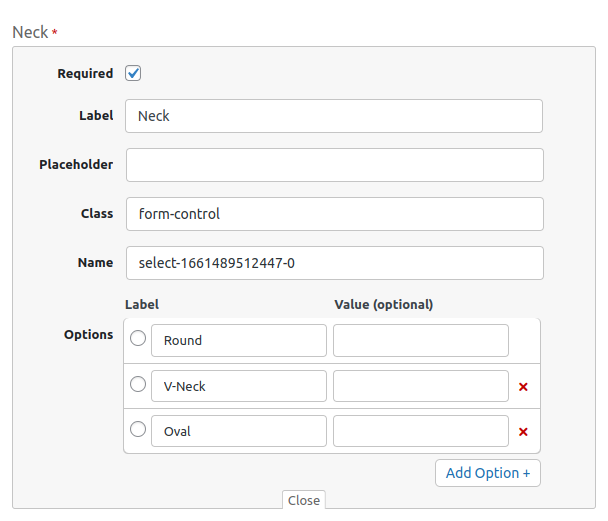
Third, we add the Neck field by picking the Select (Drop-down).
Edit the label to Neck. Add options like Round, V-Neck, and Oval to display the neck types (based on your products). And make the field as required.
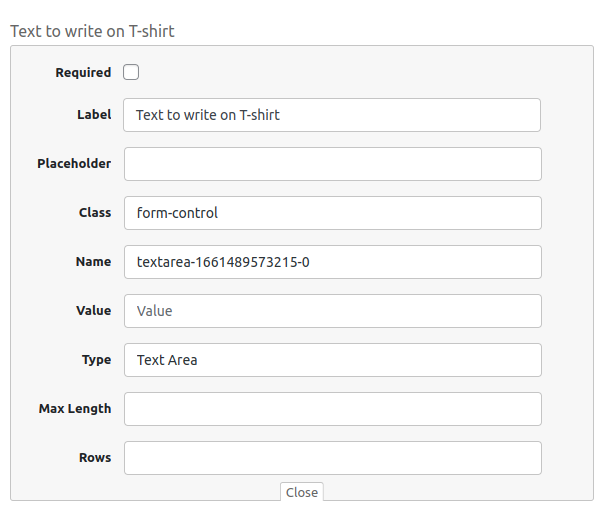
Fourth, add a Text field by picking the TextArea.
Change the label to Text to write on the T-shirt. Leave this field as optional. Because some customers want it plain, we don’t force them to print anything on their T-shirts.
Finally, provide a name (T-shirt) and save the created custom product form by clicking the Publish button on the top-right of the page.
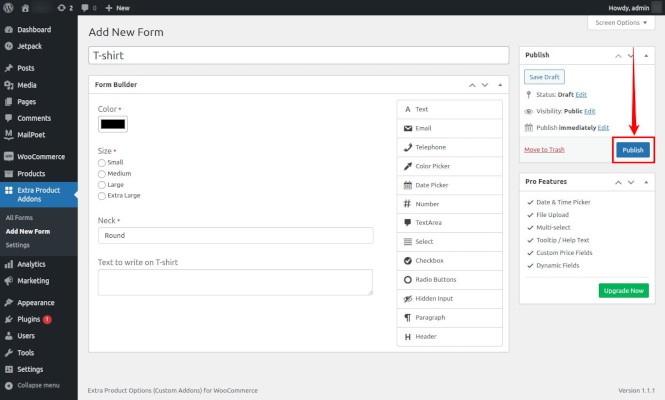
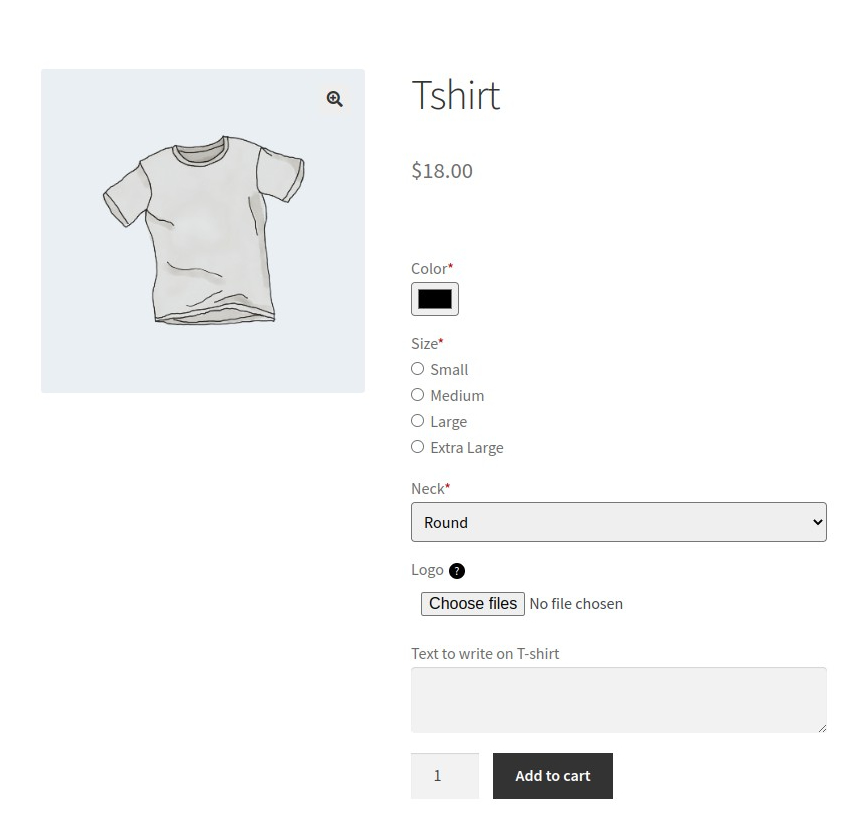
Now, we created a custom product form for our product (T-shirt).
Okay, let’s see how to add the created form to our product page.
How to Add Product Form to WooCommerce Product Page?
Go to the Products section on your WordPress. On that page, you can see all your products listed.
Select the product to which you want to add the created product form. The page opens and scrolls down a little. You can find the Product Data section.
On that, go to the Extra Product Addons option and select the T-shirt product form.
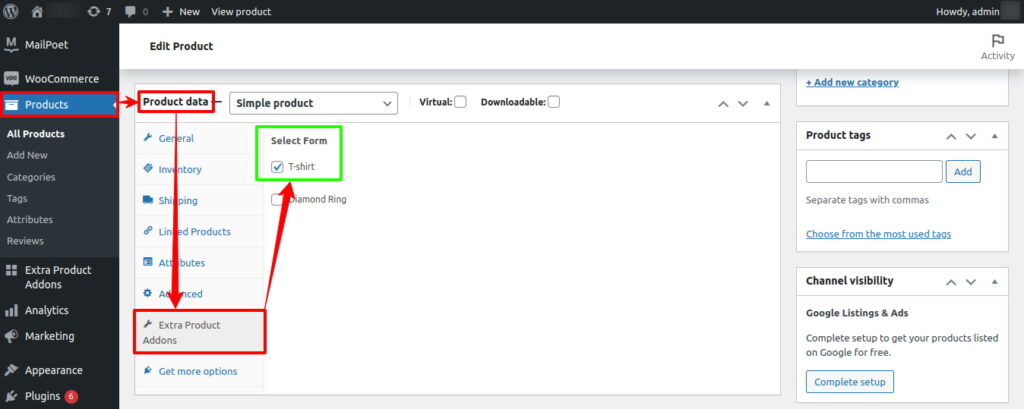
Note: You can add multiple Product Forms to a Single Product.
Click the Update button on the top-right of the page to save the changes.
That’s it! We’ve added the custom product form to the product we want.
Check it out by visiting the product page.
Fine, we’ve seen how to create a custom product form and add that to the product page with the basic features of the Extra Product Options (Custom Addons) plugin.
Let’s see how to do that with its Pro features. For that, we’ve to get the Pro pack of this plugin. I’ll tell you that step by step.
Installation & Activation of Extra Product Options (Custom Addons) Pro Plugin
Visit the Extra Product Options (Custom Addons) for WooCommerce plugin on the ThemeParrot site. Select the subscription plan based on your business needs and click the Purchase button.
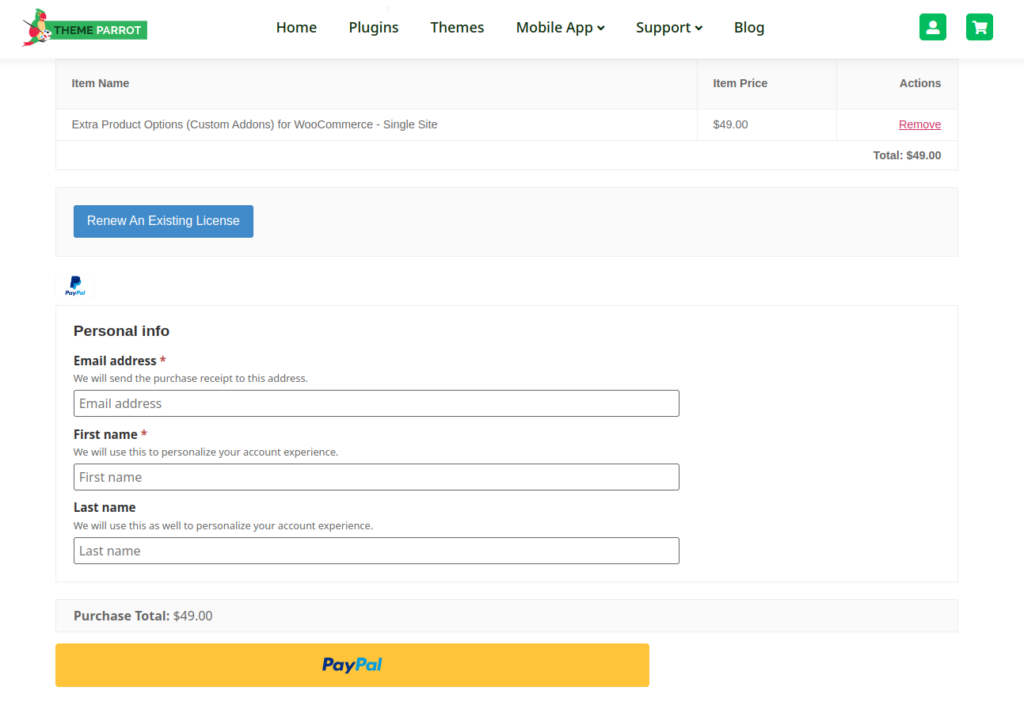
Then, it redirects to the Checkout page. Fill in your Email address, First name, and Last name (Optional). And proceed to Pay.
Next, click the Your Account icon, and the below page opens.

Click the View Details and Downloads option, and the below page opens.
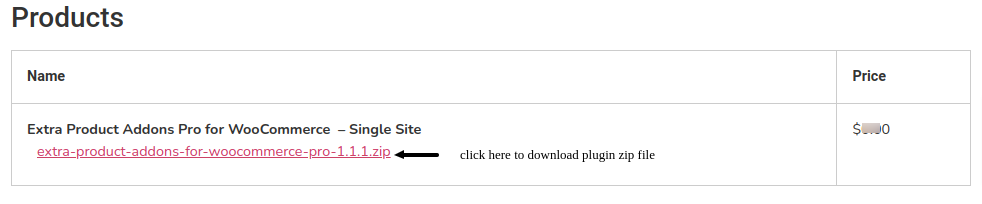
Now, click the zip file to download the Pro plugin.
Next, go to your WordPress dashboard and follow the same procedure mentioned in the free version.
Click the Activate option to move further.

Go to Settings placed under the Extra Product Addons. The below-shown page will open on your screen.

On that page,
- Put the License Key provided before (during the purchase)
- Select the Form Style (Default or WooCommerce)
- Specify the Form Order (Ascending or Descending)
- Decide the Form Position (Before or After the Add To Cart Button)
- Show or hide the Field Edit Panel when adding a new field
- Show or hide the Field Remove Warning message when removing a field
- Specify the Input Field Position in the form builder (Left or Right)
- Show or hide the Product Price (also edit the name text)
- Show or hide the Varying Price based on the options chosen (also edit the name text)
- Show or hide the Total Price of the product (also edit the name text)
- Enable or disable the File Upload option in the form
- Set the Maximum Size – limit of the file size (256 KB to 32 MB)
- Set the Format of Image, Text, Document, Font, and Compress
Click the Save Changes button at the end.
How to Create a Custom Product Form (with Pro)?
All the procedures are the same as in the free version. But, you can explore all the features with the pro.
Now, visit the product form we created earlier with the basic version (you can build a new product form). You can see all 16 types of custom product fields displayed on the fields sections of the page.
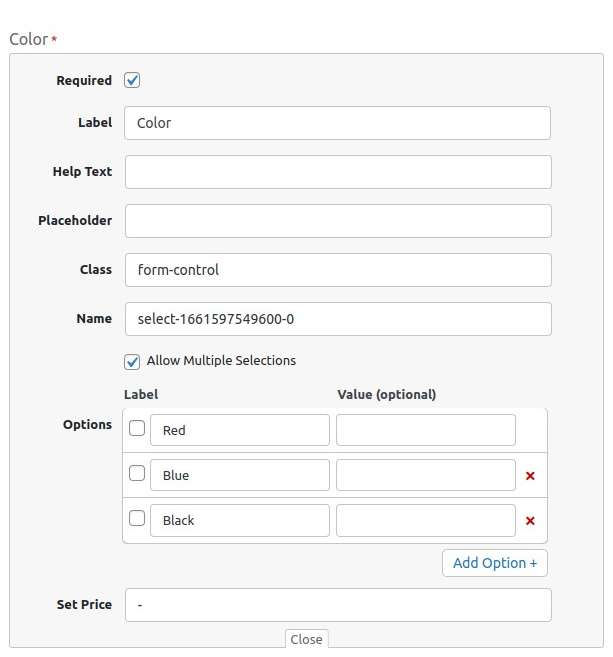
Multi-Selection (Select)
Allow your customers to select more than one option. Just enable the multiple selection checkbox.
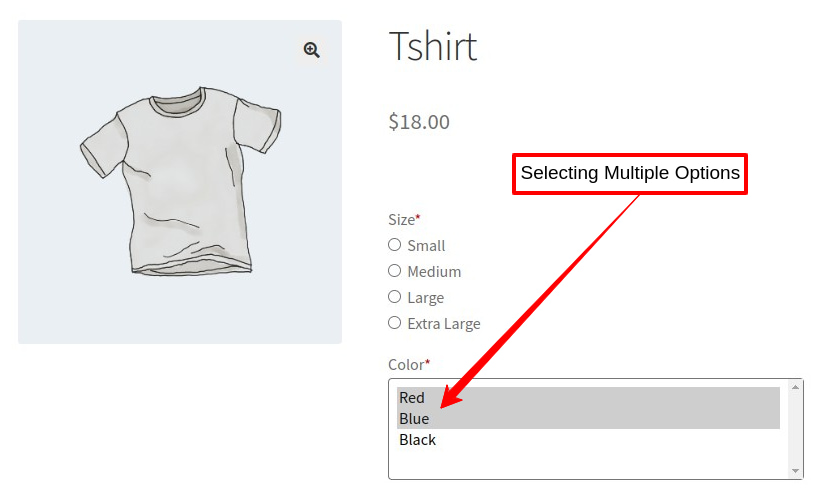
Let’s look at the product page.
On that page,
Windows Users: Hold the Ctrl button and select multiple options you want.
Mac Users: Hold the Command button and select the multiple options you want.
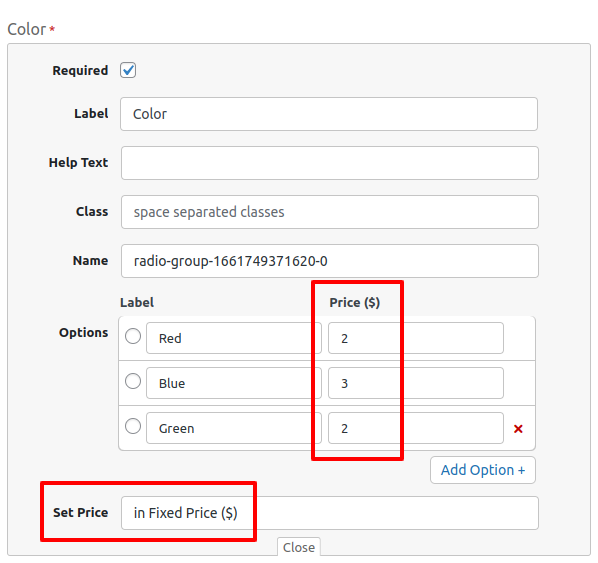
Set Price Option
The set price option is available only in the Select, Checkbox, and Radio Group custom product fields. We can see the changes on the Cart page.
Here, I choose the Select option to show you some examples.
The set price option has two choices:
- In Price
- In Percentage
1. In Price:
It specifies the value based on the options selected & price rate of the product.
On the Backend Page, set the price values for the respective colors. Select the Fixed Price option on the Set Price field.
Note: You can change the Currency in the Settings.
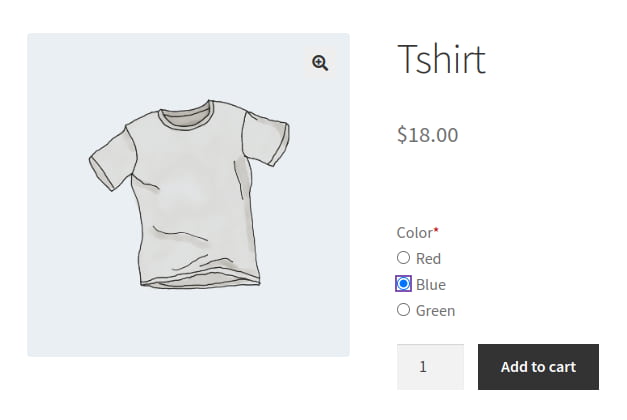
On the Product Page, select the Blue color.
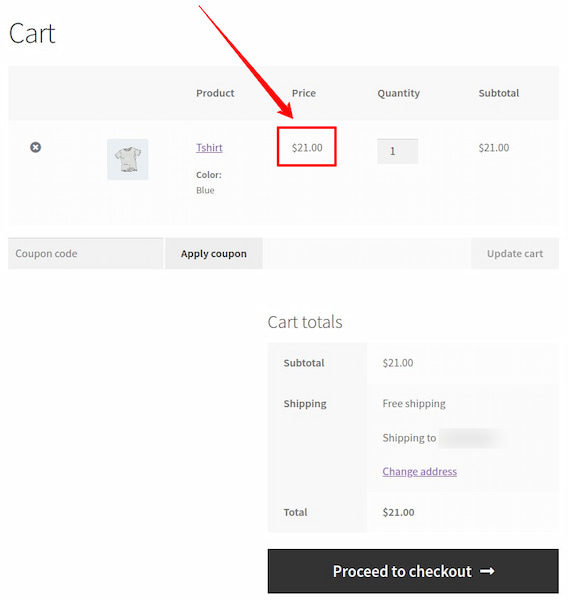
On the Cart Page, you can see the price value was increased based on the given value.
The Price of the T-shirt ($18) + The Price of the Blue color ($3) = Total price ($21).
2. In Percentage:
It specifies the value based on the options selected & price rate of the product in percent.
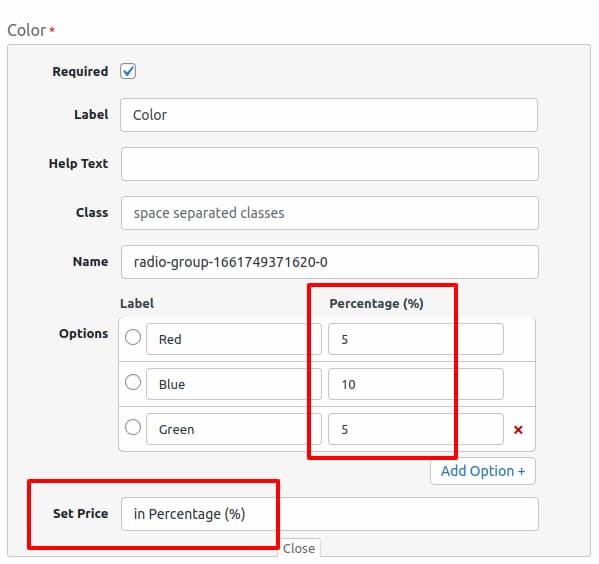
On the Backend Page, set the percentage values for the respective colors. Select the Percentage option on the Set Price field.
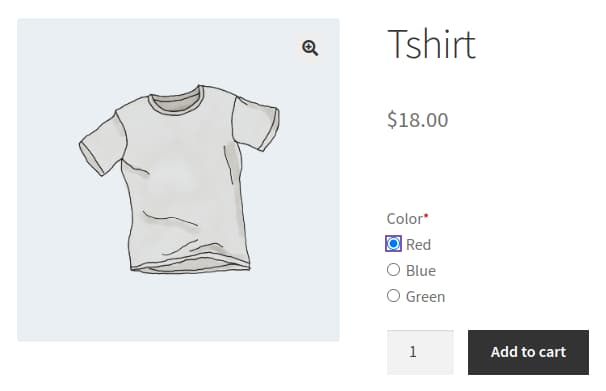
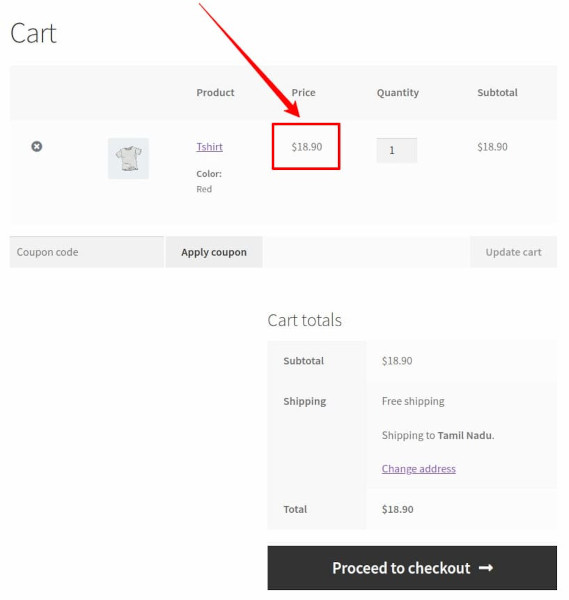
On the Product Page, select the Red color.
On the Cart Page, you can see the price value was increased based on the given value.
The Price of the T-shirt ($18) + Percentage (5%) of the Red color ($0.90) = Total price ($18.90).
Dynamic Field
The dynamic field feature helps you to show product fields only if the customers select the respective option.
We created a form with the Name, Delivery to, Home Address, and Office Address fields. Enter the suitable placeholders to display what value should enter.
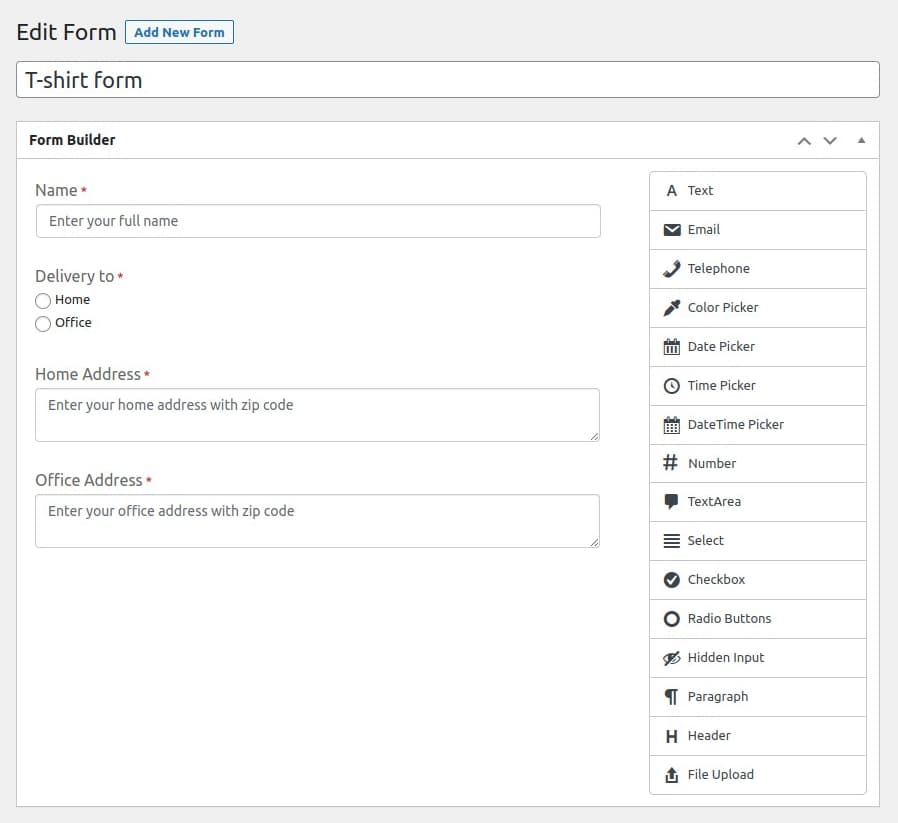
After that, scroll down the page to configure the created product form.
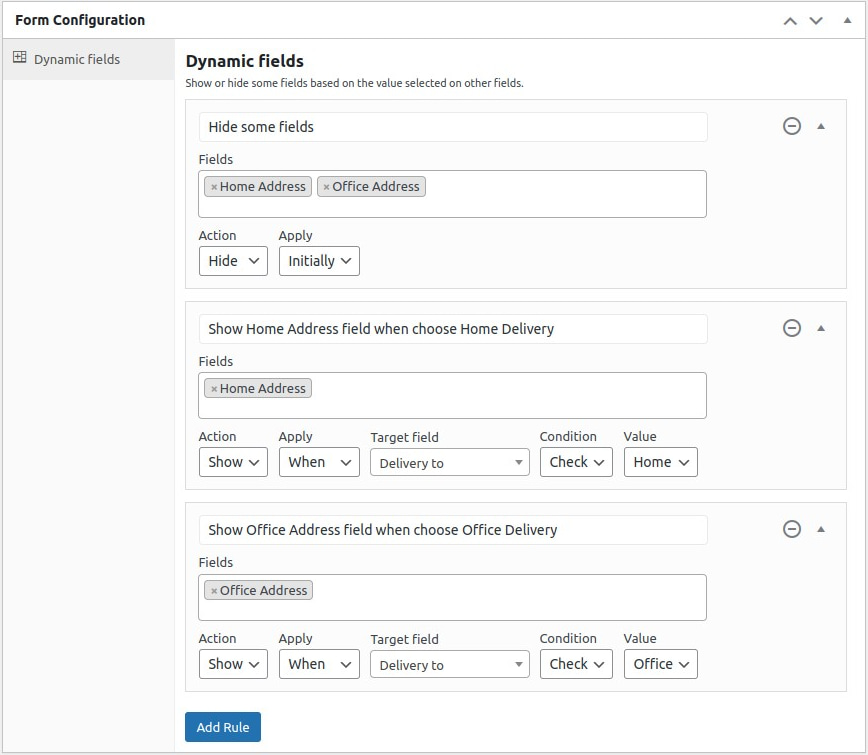
In the Form Configuration section, enter the Rule Name, and Choose the product field you want to set the rule. Select the Action to Show or Hide that field, and apply When or Initially to move further.
Set the Target Field, Condition, and the Value. Click the Add Rule button to add another rule. After setting up all the rules you want, click the Update button to save the changes.
Note: Don’t forget to select the created product form on the Products page.
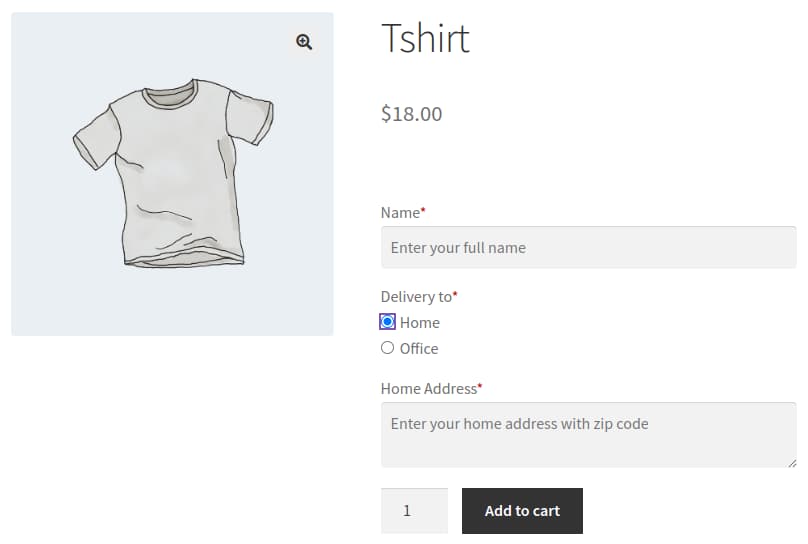
Visit the product page and perform some actions to see the changes.
Here, I clicked the Home delivery, and the Home Address field displays based on the rules provided.
File Upload & Help Text
Now, we add the Logo field by picking the File Upload.
Edit the label to the Logo. Make the field optional (I said above that uploading texts or logos is not mandatory for every customer).
In Pro, we can add the Help text for the product field.
Here, I put an explanation for the logo uploading product field. A small question mark icon displays the right side of the product field. If you hover the mouse over that icon, the message pops up.
It helps many customers by telling them what the product field is.
Also, we can allow our customers to upload multiple files as they want.
Save the changes you made by clicking the Update button.
The procedure of adding the created custom product form to the product is the same as mentioned in the free version.
After adding the form to the product, visit the product page.
Conclusion
We’ve come to the end of this guide. I clearly explained all the procedures to install, activate, product form creation, and add the form to the product page in both the free and pro versions of the plugin.
Now, it’s your turn to choose a suitable plan and provide a customized product page for your customers.
Also, you can optimize your page with its basic version if you feel enough with its free features.
Check the Complete guide of Checkout Field Editor and Manager for WooCommerce plugin.
Cheers!